Teaching Geography the Creative Way: A Pedagogue’s Classroom Diary
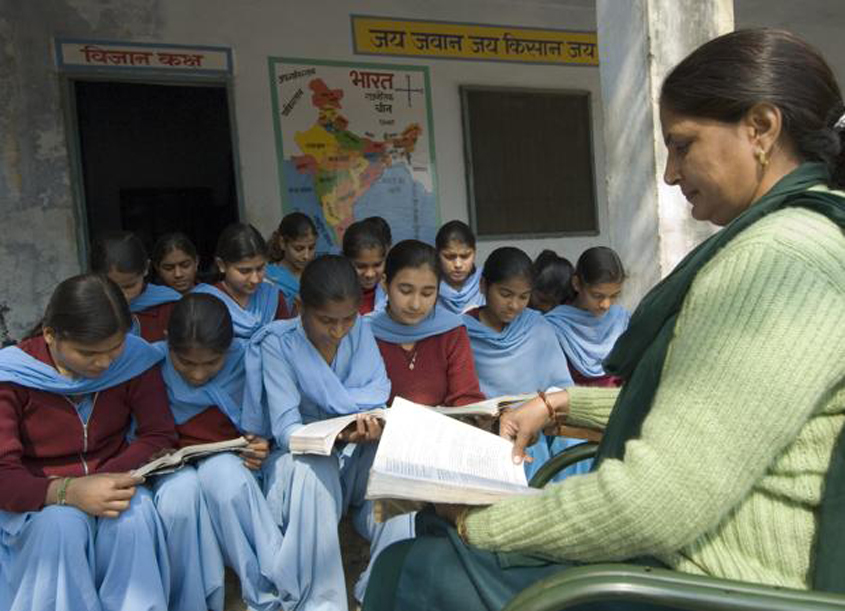
Geography is often taught as a dry discipline which requires the mechanical memorization of facts and information. A creative pedagogue shares her intriguing narrative that offers many ideas that can enliven any teacher’s classroom.
Susheela Raghavan is a post-graduate in geography; a former Geography teacher having had an illustrious teaching career at various schools in Chennai including ‘The School KFI’ and PSBB, Nungambakkam and an active member of AGTI (Association of Geography Teachers of India).
With the increasing awareness about global warming, the melting of glaciers and environmental degradation there is a need to realize that Geography is the basic subject for other disciplines and is thus extremely important. Geographical knowledge at the school level alone can make our future citizens proactive and equip them to remedy the mistakes of the past generations. This brings us to realize that dissemination of Geography needs to be made interesting for the children within the classroom. We have to erase from our minds that the subject contains mere facts. Rather, educators must help revive interest in the subject by establishing a relation between lived realities and the discipline of Geography.
The old adage, modified, says that by reading alone children forget; by seeing they know, but remember only for a short while; whereas by doing they understand and learn. This method is a time tested one. The power of touch is very strong. No doubt, technology helps in imparting knowledge easily, but the user i.e. the teacher should know the basics of the subject to use the tool effectively. In a recent quiz contest held for the teachers of Geography, the lack of knowledge of the subject came to light.
The basic concepts in Geomorphology are latitudes, longitudes and land forms whereas in Climatology a good grounding in the knowledge of atmospheric pressure, heat zones i.e. weather phenomenon is necessary to understand their impact on our lives. It is a common problem across schools that these concepts are taught mechanically to students and ironically even the books dealing with global warming and connected issues are also often written quite superficially.
It is like building a multi-storey building without proper foundation. We often read in newspapers how many of the high rise buildings are collapsing and thus endangering many lives. It is in a similar manner that we are endangering our own lives by creating an unbalanced relation with the “Nature”. This is bound to lead to a disaster.
The purpose of this article is to highlight some activities involving children, which will inspire them. These are simple experiments; using advertisements from the newspapers or magazines; making models or instruments used in surveys etc. Many of the older generation would recall how technological advancements in pedagogic practice are a recent phenomenon and the teacher was single handedly responsible for creating vibrant classrooms. In fact, the teacher’s fertile imagination and creativity were her greatest assets. The ideas that I am going to share here are low cost and effective in transforming the classroom from a dull to a vibrant space where learning is enjoyable.
Here, I will be sharing some of my approaches including experiments that I employed while dealing with the subjects. Some are suitable for the late primary and middle school levels and some are for senior students.
ACTIVITY 1: To teach latitudes, longitudes, rotation and revolution for the 4th, 5th and 6th grade children, you can use fruits like oranges and apples (which do not have big seeds). The teacher cuts them horizontally, with uniform thickness. Then take a globe and correlate with the latitudes marked by pointing out the similarity of shape. The learning outcome is, they know the latitudes are parallel and the distance between two parallel is constant. They also learn that these form as “the Great Circle” – Equator and others as Small Circles (stressing that they are imaginary lines). When the fruit is cut vertically, all the slices will be the same size. When put together the circles meet in the top and bottom and they are all same in size. This can be correlated with longitudes marked on the globe. An activity can be followed by children demonstrating on their own the latitudes and longitudes. There are different activities to explain these concepts.
ACTIVITY 2: Another popular activity is using the globe and a powerful torchlight to show day and night. The teachers can deal with how the light beam proceeds. She directs the beam north and south of the globe and shines the torch. She then makes the children touch the globe near the equator and then near the pole, then elicit their response about the heat energy that is produced.
To correlate with Biology, here are some simple experiments to understand the porosity of soils, how springs are formed.
EXPERIMENT 1
How springs are formed: This can be done as demonstration experiment.
Materials required: A tin can with opening on both sides. One can use Bournvita or other tins, in which case you must cut one side; then a glass trough from the Chemistry laboratory; jugs full of pebbles, sand, soil and hard clay; watering can or a jug with water.
Method:
Step 1: Fill the trough with hard clay at the bottom, this layer needs to be fairly tight. Over this fill with pebbles and then another layer of soil, and over this layer spread some more soil mixed with sand.
Step 2: Drive the can into the soil, till it touches the pebble layer.
Step 3: Pout water around the can or sprinkle water from the watering can, to resemble rainfall. There should be some water over the sandy soil. Wait for a few minutes, you will find clean water oozing into the can from the bottom. Ask the children to observe and explain about the impervious layer in the soil profile and acquifers. In some areas where the acquifer is present, the rainwater percolated forms the water table. The water comes out in the form of spring if a well is dug. Wherever there is crack or opening in the layers of rock or soil, the water will come out as natural spring. One example is Talaikauveri in Coorg, which is the source of Kaveri.
EXPERIMENT 2
How trees or vegetation prevent soil erosion and increase rainfall.
Materials required: Good old soap box with the lid; some soil to fill the boxes; a few seeds of fenugreek or mustard; a tumbler/glass of water.
Method: Step 1: Pierce a small hole in the sides of the box. Then fill both the sides with soil. Sprinkle a few seeds in one of the sides.
Step 2: Sprinkle water in both the boxes. Every day sprinkle water in the side, where you have planted the seeds. Wait for 4 or 5 days for the seeds to sprout.
Step 3: Once the sprouts are nearly 1 ½” long, pour some more water in both the boxes. Tilt both of them slightly. You will find pure water oozing out of the holes, from the side where the sprouts grow. From the other side along with water soil also will drain out.
Step 4: Invert the boxes. From the side where plants have grown, the soil will fall like a cake showing the intertwining of the roots. From the other, soil will fall freely. Explain how the roots of trees bind the soil even on mount slopes and prevent soil erosion.
EXPERIMENT 3
How to demonstrate the process of transpiration
Materials required: A small pot with a plant; a big plastic bag; string to tie.
Method: Cover the plant with the plastic sheet, the sheet should not touch the plant. Tie the plastic bag/sheet at the bottom. Wait for a few minutes. You will find droplets of water inside the plastic bag. Ask the children to point out their observations and inferences. Then you can go on to explain and highlight the importance of forest cover, resulting in the increase of rainfall which is achieved by planting trees.
There are a variety of experiments, which can be co-related with Physics and Geography. One such is an experiment to make the children know how warm air will rise and cool air descends. This can be done by children as a group work.
Materials required: Two tiffin carriers with three compartments. If done by children you need more than a pair of tiffin carriers. This depends on the number of groups. Two flasks one for keeping hot or boiling water and another for very cold or ice water.
Method: Make sure the tiffin carriers have lids to close. Open one and pour hot water in the middle compartment and quickly close the lid. The upper and bottom compartments should be empty. Similarly, pout ice water in the middle compartment of the carrier. Wait for a few minutes at least 3 minutes. Ask the children to open the lid of one of the carrier and put their hands and feel the air. Then they must close the lid. Then ask them to lift the upper two compartments and feel the air in the bottom compartment. This action is to be repeated with the other carrier too. After closing the carriers, ask their experience. They would say that in the carrier with the hot water, the upper compartment was warmer than the bottom, whereas in the other one, the bottom was cooler that the top compartment. The teacher can explain the reason with this experiential learning the children understand that the air in the Tropics are warm and that of Artic region the air is cold. The same phenomenon occurs in the valleys. In winter Srinagar in Kashmir is colder than Jammu. That is the reason why during the Britisher’s rule the Government would shift to Jammu in winter.
Here is another interesting experiment to show them how “Perma frost” is formed in the higher latitudes ie. beyond 65 degrees north of the equator – In the Southern Hemisphere, there are no land mass beyond 55 degrees – The only one found is Antartica which has only ice cap. Perma frost, means frozen ground below the ice.
Materials required for this: Refrigerator, freezing tray without compartments; a hand full of soil mixed with vegetation.
Method: Put the soil in the tray. Over that gently pour water to cover it. Keep the tray in the freezer overnight. Next morning take the tray and invert it, the frozen soil will come out like cake along with the ice.
The explain, how difficult it is for plants to grow in these regions except moss or lichen, which have shallow roots. This can be done at home by children.
Let us move on to another type of activity. This strengthens their map skills. We all have google maps to help us navigate, but how many know this is the basic skill in Geography? Reading maps along with the directions is important to use google maps.
Here the teacher has to use Atlases. Then ask the children all that they find in their atlases. From their random answers, write down their comments and observations on the board. Then classify them as thematic maps and other general information. Draw their attention to “contents page” and “index” pages. Ask the children the difference between these two. Play a game by asking them where they would look for countries and cities. Follow this with grid reference and the two coordinates ie: latitudes and longitudes. In the process you can teach them relative directions and absolute directions. By this activity they also learn about northern and southern hemispheres as well as eastern and western hemispheres. The concept of “Time Zones” can be taught through the map. It will be interesting for the children if you relate it to International events, especially sports.
Another forgotten skill is drawing of maps. Using squares, the children can learn how maps can be enlarged and reduced. This may sound outmoded, but it is very relevant for children who want to learn graphic designs. This skill helps to develop eye and finger coordination, estimation and dexterity.
Making a simple clinometer to measure the height of building even hill. Here a teacher can take the help of a mathematics teacher to convert the angles to feet (for measuring height or altitude) with the knowledge of Trigonometry. Even Clark’s table or logarithms will help.
How to make simple clinometer?
Materials required: 30 centimeter wooden ruler/foot ruler; protractor (found in the geometry box). A cello tape; A string 15” long; a washer or even a small stone/pebble.
Procedure: Step 1: Tie the washer or the stone to one end of the string. Tape the other end to the mid point of the protractor. The string should fall across the 90 degrees, as shown in the diagram:
The string thus taped/strapped is called a plumb line. Tape the foot ruler to the protractor, leaving an inch on one side. The other side will extend beyond the protractor. The ruler is your viewer.
Step 2: choose a hill (if the school is near one) or a tall building. Stand away from the building. Slowly tilt the scale with the protractor and see along the edge of the ruler. The plumb line will hang down. This line of vision should coincide with the top of the building or summit of the hill. Without moving ask your partner to read the angle. The degrees shown will give you the angle of the slope. This angle has to be converted into feet or altitude. With the help of Trigonometry or Clark’s table or logarithm (I wonder whether they are available!).
All these activities are suitable for middle school or high school classes. Contrary to the popular belief that activity based learning kills precious teaching time within the classroom in fact it is through these that children learn faster and their knowledge is internalized. They also help in developing their observational and cognitive skills.
This article is published in The New Leam, JANUARY 2017 Issue( Vol .3 No.19) and available in print version. To buy contact us or write at thenewleam@gmail.com
The New Leam has no external source of funding. For retaining its uniqueness, its high quality, its distinctive philosophy we wish to reduce the degree of dependence on corporate funding. We believe that if individuals like you come forward and SUPPORT THIS ENDEAVOR can make the magazine self-reliant in a very innovative way.


